Beginner's Guide to Wheel Throwing: Your First 10 Steps from Clay Wedging to Centering
Beginner's Guide to Wheel Throwing: Your First 10 Steps from Clay Wedging to Centering
Almost everyone who abandons the potter's wheel does it in the first three sessions, and almost always at the same moment: the lump of clay will not stop wobbling. The frustration is real, but it is predictable. Centering looks like a test of hand strength; in practice it is a test of preparation, posture and patience — clay that has been wedged properly, stuck firmly to a clean wheel head, with arms braced so the clay receives steady pressure instead of a shove.
What follows is the sequence in order, from the bag of clay to a centered mound you can trust. Work through it slowly. Speed comes later.
Steps 1–2: Choose Your Clay and Set Up the Wheel
Start with one to one and a half kilos of a mid-fire stoneware or a smooth earthenware — something a supplier would describe as plastic and forgiving. Fresh clay from a sealed bag is usually ready to use. If a coil bent around your finger cracks instead of curving, the clay is stiff: sprinkle it with water, wrap it in plastic and leave it overnight. Clay that is too soft behaves just as badly, slumping under its own weight, so aim for the consistency of firm butter. In a first class, avoid heavily grogged clay and porcelain; both can be wonderful later, but they make the early lessons harder than they need to be.
Set the wheel up before you touch the clay. Splash pan on, bucket of water within reach, sponge and wooden rib beside you, cutting wire where you can grab it without standing up. Wipe the wheel head clean and dry, because a damp or gritty head lets the clay slide. If the head is bare aluminium and very smooth, a light scuff with a scourer gives the clay something to grip. A bat, if your wheel takes them, saves you from wrestling a wet pot off the head later.
Arrange the rest of your body, too. Tie back long hair, remove rings and watches, and keep sleeves out of the way. Short fingernails are not a fashion statement on the wheel; they are a way to avoid gouging the clay when you meant to smooth it. Set the wheel at a slow-to-medium speed and leave it there for now. A beginner does not need speed. A beginner needs a wheel that turns steadily enough to show the wobble without throwing water and clay across the room.
Step 3: Wedge the Clay Until It Feels the Same on Every Side
Wedging does two jobs: it evens out moisture and squeezes out the air pockets that later become cracks or a mound that twists as it spins. Ten minutes here saves an hour of fighting.
- Shape the lump into a rough cone on a plaster bat or a clean, slightly absorbent surface.
- Press down and slightly forward with the heel of your right hand, compressing the near side of the cone.
- Bring the far side over the top with your left hand, rolling the clay back into a cone.
- Give the lump a quarter turn and repeat.
- Work through forty to fifty passes, keeping a rhythm; the clay should feel identical wherever you press it.
- Test it by cutting the lump in half with a wire. Dark holes and swirls on the cut face mean air is still trapped, so keep going.
If spiral wedging doesn't click, ram's head wedging — pressing the lump down and forward alternately on four sides — works well for many beginners, especially with stiffer clay. The goal is the same: a homogeneous lump with no hard spots and no trapped air. When you think you are done, wedge for another minute. Beginners almost always stop too early, and the wheel is unforgiving about small inconsistencies. A well-wedged lump feels slightly warm and consistent in your hands, like a dense piece of bread dough that has been kneaded just enough.
Step 4: Fix the Clay to the Wheel Head
Slap the wedged lump onto the center of the wheel head rather than dropping it from a height. Press it down firmly with the flat of your hand, then use the heel of your hand to seal the base to the head. The clay should sit like a low dome, not a leaning tower. If you are using a bat, follow the manufacturer's advice; some bats need a barely damp surface, while a bare metal wheel head should be dry and clean. Spin the wheel slowly and watch the lump for a few revolutions. If it shifts, stop the wheel, press it down again and start from a true center. A lump that is off-center by a centimetre will multiply into a wobble that no amount of hand pressure can fix.
Step 5: Set Your Posture and Brace Your Arms
Sit close to the wheel with your feet flat and your thighs roughly parallel to the floor. The wheel head should be at a comfortable height, often around waist level. Bring your elbows in against your thighs or hips so your forearms can rest over the wheel. This is the part beginners skip, and it is the part that makes centering possible. Your hands are not meant to hold the clay still on their own; your braced body holds your hands still. Keep your shoulders relaxed and your wrists firm but not rigid. If you have to lean forward and chase the clay, the wheel is too far away or too high.
Step 6: Start the Wheel and Wet the Clay Gently
Start the wheel at a moderate speed and wet your hands rather than pouring water over the clay. A sponge kept in the water bucket is useful for adding a little moisture to the surface, but too much water turns the clay into slippery slip and weakens the base. The clay should glisten, not swim. If water pools on the wheel head, stop and mop it up. You want lubrication, not a puddle. Keep the wheel speed steady; changing speed in the middle of a pressure move is like changing gear halfway through a turn.
Step 7: Cone Up and Down to Align the Clay
Cupping the lump between both hands, squeeze inward and slightly upward to draw it into a cone. Keep your elbows braced and let your body do the work. Then press the cone back down with the heel of your hand. Repeat this coning up and down three times. Coning aligns the clay particles, helps release trapped air and teaches you where pressure actually goes. It is not a contest to make the tallest cone. A low, steady cone is more useful than a dramatic one that twists at the top. If the base slips or the top corkscrews, stop, press the clay back into a dome and begin again.
Step 8: Rough-Center with the Heel of Your Hand
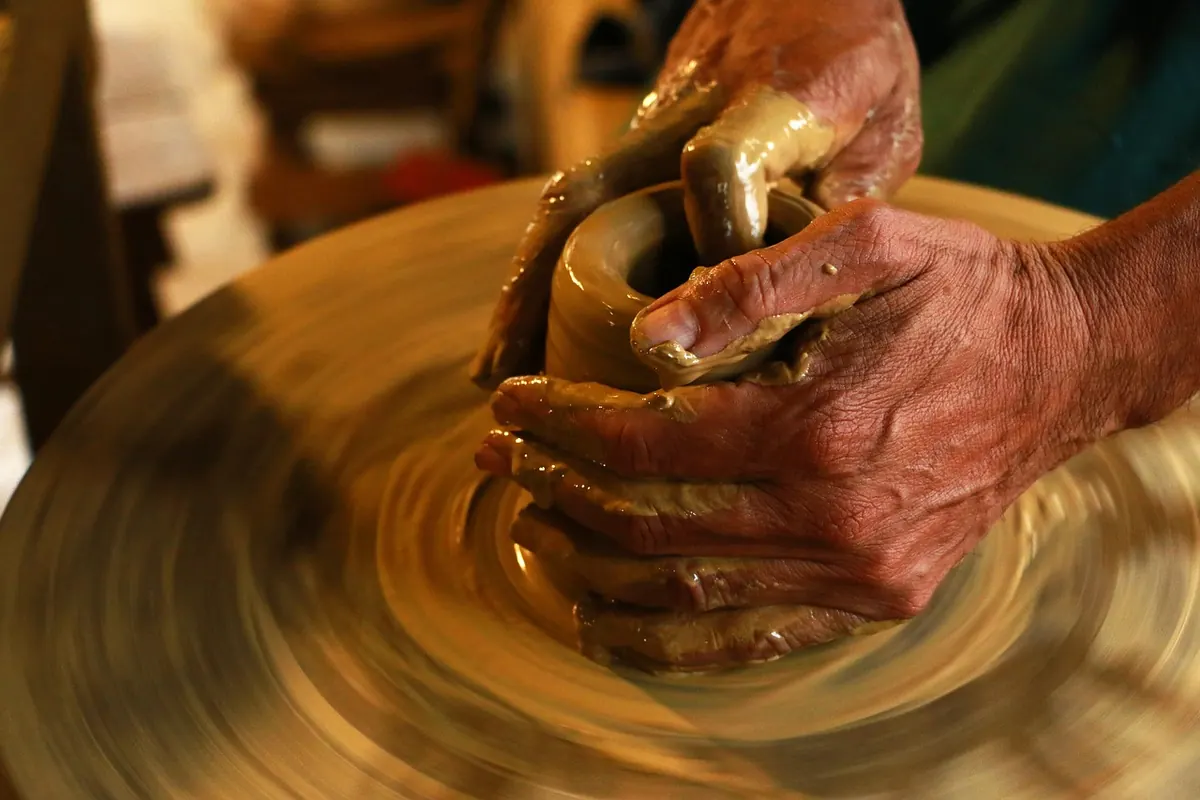
With the wheel spinning, place one hand against the side of the mound for support and use the heel of your dominant hand to press down and inward from the top edge. The pressure should come from your braced arm, not from a sudden shove. The clay will resist, then begin to move toward the center. Work around the mound steadily, keeping the wheel speed even and adding only a little water when the clay drags. If the mound leans, press gently on the high side. If it pulses under your hand, you are still in the rough stage; keep the pressure constant and let the wheel bring every side of the clay to the same place.
Step 9: Refine the Center with Both Hands
Once the lump is roughly symmetrical, bring both hands around it and smooth the sides with your palms and fingers. Flatten the top slightly with the heel of your hand. A centered mound should look like a low, even dome, with no bulge on one side and no dip on the other. Move your hands slowly up and down the sides rather than gripping and releasing. Equal pressure is the whole secret. This is also the moment to remove excess slurry with a sponge, because a wet, slippery mound feels centered even when it is not. Do not open the clay yet. Many beginners open too early and then blame their centering when the real problem was impatience.
Step 10: Test the Center Before You Open
Slow the wheel and look at the mound from the side. The top should not rise and fall as it turns. The profile should not pulse. Rest a fingertip lightly on the top and feel for a bump that comes around once per revolution. If you feel one, the clay is still off-center: cone it up and down again, then re-center. If the mound turns around a still point, you have done the first real job of wheel throwing. Stop for a moment and notice what that feels like — steady hands, steady arms, steady breath. That is the feeling to return to every time the clay starts to fight.
If the clay is wobbling, slow down and brace. Speed hides nothing; it only makes the wobble harder to fix.
Why Centering Fails — and What to Do Next
Most failed centering attempts come down to a short list of causes. Check these before you decide that wheel throwing is not for you:
- The clay was never truly wedged. Hard spots and air pockets make the mound move unpredictably. Cut a lump open to check your work.
- The clay was not fixed firmly to the head. A base that slides will never center. Stop the wheel and press it down again.
- The elbows were floating. If your arms are not braced against your body, your hands cannot apply steady pressure.
- Too much water was used. Slippery clay feels smooth but behaves badly. Keep the surface damp, not soaked.
- The wheel was too fast. Speed makes beginners chase the clay instead of guiding it.
- You stopped too soon. A mound that is almost centered is still off-center. One more coning pass often solves the problem.
A Simple Practice Session for Your First Week
Do not try to make a finished pot every time you sit at the wheel. For the first few sessions, practice the sequence and then cut the clay off the head. Repetition builds the muscle memory that later lets you center without thinking.
- Wedge one kilo of clay for ten minutes.
- Mount it firmly and set your posture before starting the wheel.
- Cone up and down three times.
- Center the mound, then stop and check it from the side.
- Cut the clay off with the wire, wedge it again and repeat.
- Keep the session to about forty-five minutes, and stop before frustration takes over.
By the end of the week, the goal is not a shelf of pots. The goal is a centered mound that you can produce reliably, with a body position you can repeat. Once that feels ordinary, opening and pulling will make far more sense — and the wheel will stop feeling like an opponent.
Photo: Pexels / Pixabay