How to Fix Common Wheel-Throwing Mistakes: Off-Center Pots, Thin Walls, and S-Cracks
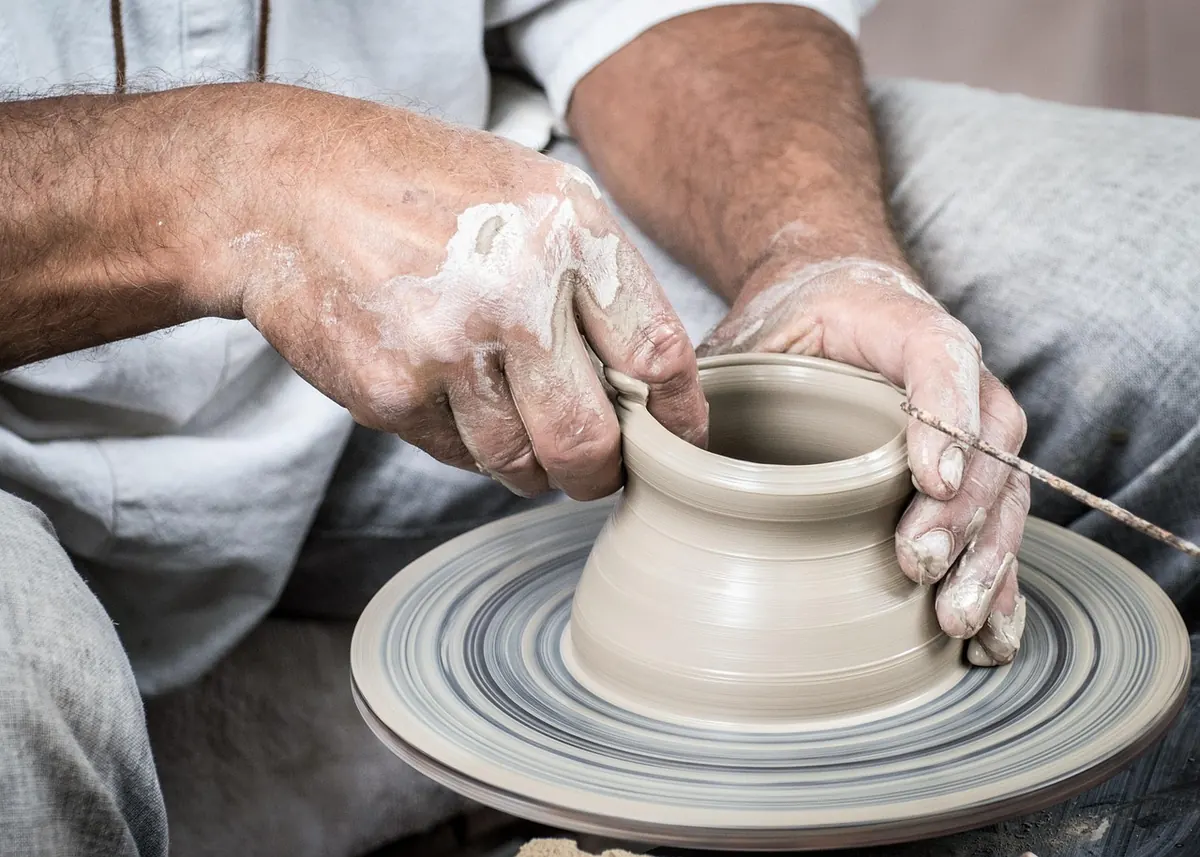
Every potter has pulled a bowl off the wheel, set it on the shelf, and watched it lean like a fence post in a gale. The good news is that these problems are rarely mysterious. They are the physical record of a decision made earlier in the throw, usually within the first minute. Learn to read the pot while it is still spinning and you can correct most faults with a touch, a slower wheel, or a change of hand position — long before the piece reaches the shelf.
Start With the Center, Because Everything Else Inherits It
Most off-center pots were never properly centered in the first place. Clay can look round and still hold a hidden spiral of tension inside it, which is why potters talk about a false center. The wheel spins, the lump appears symmetrical, but the moment you open it the walls rise unevenly and the rim climbs on one side.
The cure is boring and effective. Cone the clay up and down at least three times, pressing with the heel of your hand rather than your fingertips, and keep both hands together as a single unit. Brace your elbows against your thighs or the splash pan so your arms do the work instead of your wrists. Each cone-up forces any trapped spiral to unwind; each cone-down re-forms the mass around a true axis. If you find yourself coning once and calling it done, you have found your problem.
The wobble test
Before you open the clay, stop the wheel and look straight down at the top of the lump. Then spin it slowly and watch the rim of your opening as it comes around. A pot that is truly centered will hold its shape through a full revolution. Mark the high side with a wet fingertip, press it gently inward at low speed, and check again. Two or three of these small corrections are quicker than re-throwing a pot later. If the lump resists after several attempts, cut it off, wedge it properly, and start again — twenty minutes lost now saves an hour of frustration.
Off-Center Pots: Finding Where It Went Wrong
A pot that leans at the rim usually has one of three causes, and each has a different signature.
- Opened off-center. The hole was drilled a centimetre from the true axis, so one wall is thicker from the start. It rises more slowly and the pot ends up lopsided.
- Hands not opposing each other. If the inside finger pushes while the outside hand merely follows, you are moving the wall rather than thinning it. The clay shifts sideways instead of upward.
- Too much speed, too little contact. Pulling fast on a high wheel speed causes the wall to spiral and torque. The pot looks fine wet and twists as it stiffens.
Mid-throw correction is possible if you catch it early. Slow the wheel to a crawl, wet the wall lightly, and support the inside with your fingers while pressing the high side with a rubber rib. Work in short strokes from the base upward and re-check the rim after every pass. For a pot that is only slightly out, the simplest fix is to let it stiffen, then trim a level rim on the wheel head — a deliberately cut rim reads as a design choice, not a mistake. For a pot that is badly off, reclaim the clay. Forcing it back into shape usually leaves a wall that will crack or slump in the bisque.
Thin Walls, and Why They Usually Appear Near the Rim
Walls rarely go thin evenly. The top inch is where trouble collects, because that is where the clay has been pulled the most times and where there is least material to begin with.
The most common cause is pulling too many times. Each pass removes a little clay and compresses the wall, and after four or five passes on the same section there is nothing left. Aim for two or three deliberate pulls per section rather than a series of nervous little ones. Second is technique: pinching with fingertips instead of squeezing with the whole hand. Your inside finger should act as a support and a gauge, while the outside hand — knuckles, then palm — does the thinning. Think of shaping the wall between the two, not scraping it.
Third is the sponge. A sponge held against a spinning wall removes clay fast, and it removes it unevenly. Use the sponge to wet and to clean, and use a rib to compress and even the surface. If you want to check thickness, tap the wall with a fingernail and listen: a consistent ring from base to rim means consistent thickness, while a dull thud near the top means you have gone too far.
If a pot is already thin when you notice, stop touching it. Leave it on the bat, cover it loosely, and let it stiffen before you wire it off. Thin walls fail mostly through handling and fast drying, so trim only the base and keep your fingers off the walls. Slightly thick is recoverable. Paper-thin is not.
S-Cracks Begin at the Bottom
The S-shaped crack across the base of a pot is nearly always a drying problem with a throwing contribution. Two things combine: a floor left noticeably thicker and wetter than the walls, and uneven drying that pulls the base in a different direction from the sides. The crack opens because the thinner wall shrinks first and drags the base with it.
The throwing half of the fix is compression. When you open the clay, press the floor down and outward from the centre in a spiral, then back inward, with a firm, flat fingertip or the back of a knuckle. Do this twice. Do not leave a puddle of water in the bottom — a wet floor is a slow-drying floor, and a slow-drying floor sits next to fast-drying walls.
The drying half is patience. Loosen the pot from the bat with a wire, then cover it with a plastic bag or an upturned bucket so the rim and the base lose moisture at similar rates. Many potters dry bowls rim-down on a board, which lets gravity and evaporation work evenly. Keep pots out of draughts and away from radiators. If you work in a dry studio, a damp box — a plastic storage crate with a wet towel or a slab of damp plaster in the bottom — will hold greenware for weeks.
If an S-crack appears at the leather-hard stage, you can sometimes close it by damping the area, compressing the crack shut with a rib, and drying the piece very slowly. Be realistic about the odds. Repairs at this stage often reopen in the bisque firing, so treat prevention as the actual fix and the repair as a rescue attempt.
A Troubleshooting Order to Work Through
When a pot goes wrong, work backwards through the process rather than guessing.
- Check the clay itself. Wedge it thoroughly, feel for firm and soft patches, and slice a lump open to look for air pockets.
- Center at a moderate wheel speed, cone up and down three times, and confirm with the wobble test.
- Open at the true centre and compress the floor in both directions.
- Pull in two or three slow passes per section, with hands opposing each other and a rib to finish.
- Leave the rim a fraction thicker than the wall it sits on.
- Wire off, cover, and dry slowly and evenly before trimming.
Build One Habit and Most Faults Disappear
If you change nothing else, change this: stop the wheel and look at the pot after every stage — after centering, after opening, after the first pull, after the last. Ten seconds of observation at each step tells you more than an hour of diagnosis on the shelf. Keep a small notebook near the wheel and jot down what you saw and what you did about it. After a dozen pots you will recognise your own patterns: the wall that always thins at the rim, the base you always leave too wet, the pull where your hand drifts.
Throwing well is less about talent than about attention to the early decisions. Center carefully, compress the floor, pull fewer times with more control, and dry slowly. Do those four things and the off-center pots, thin walls, and S-cracks that once seemed like bad luck start to look like what they are — habits you can correct.
Photo: LubosHouska / Pixabay